General
This document contains a list of software that will be used in the first semester of the first year by new students within the Bachelor of Cybersecurity at Howest University College. Follow the installation guide to be fully prepared. Please read everything carefully!
Verify your Howest account
Basic IT on campus
A general starting page for all Howest students can be found here: “English” or “Nederlands”.
Within the “Infosite” course (NL Infosite and EN Infosite) on our learning management platform ‘Leho’, you’ll find information about the specific bachelor, including the IT presentation.
IMPORTANT Installing/configuring most of the software in the next steps will only work if you have received an active and working Howest account. This means that you should be able to login to our learning platform ‘Leho’ and/or Microsoft Office with your Howest credentials (e-mail/password).
If you still encounter problems with this, try contacting the IT helpdesk of Howest.
GitLab
We will make extensive use of GitLab to host & manage Git projects (which are called repositories). The next sections should explain how to obtain a GitLab account and how to set it up.
Proceed to initial configuration
Initial installation and configuration
Before you install any software suites, install and configure the following:
IMPORTANT
Do not leave this installation session until all of the above have been completed. The lecturers are present to offer support for these topics specifically, which may be tricky to complete on your own.
GitLab
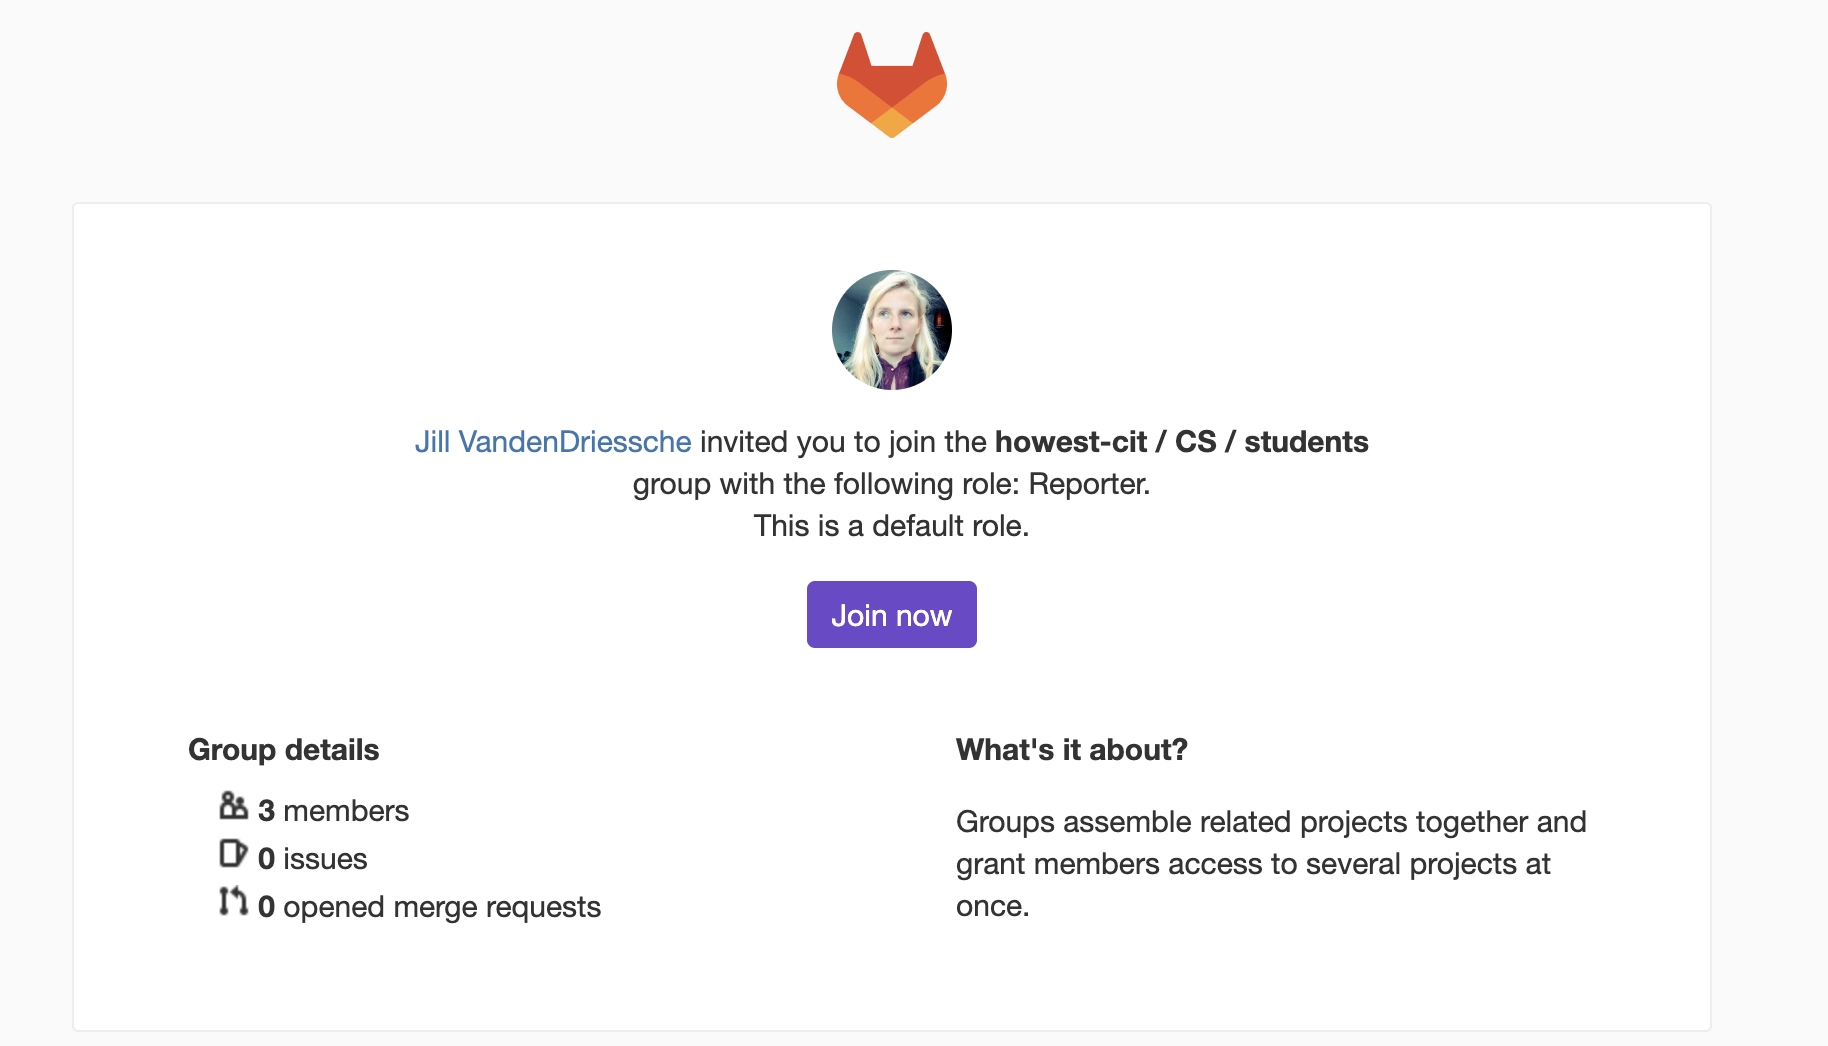
To create your GitLab account you should have gotten an invite email on your howest email-address with subject “
After clicking on the Join now button you should be redirected to a registration page.
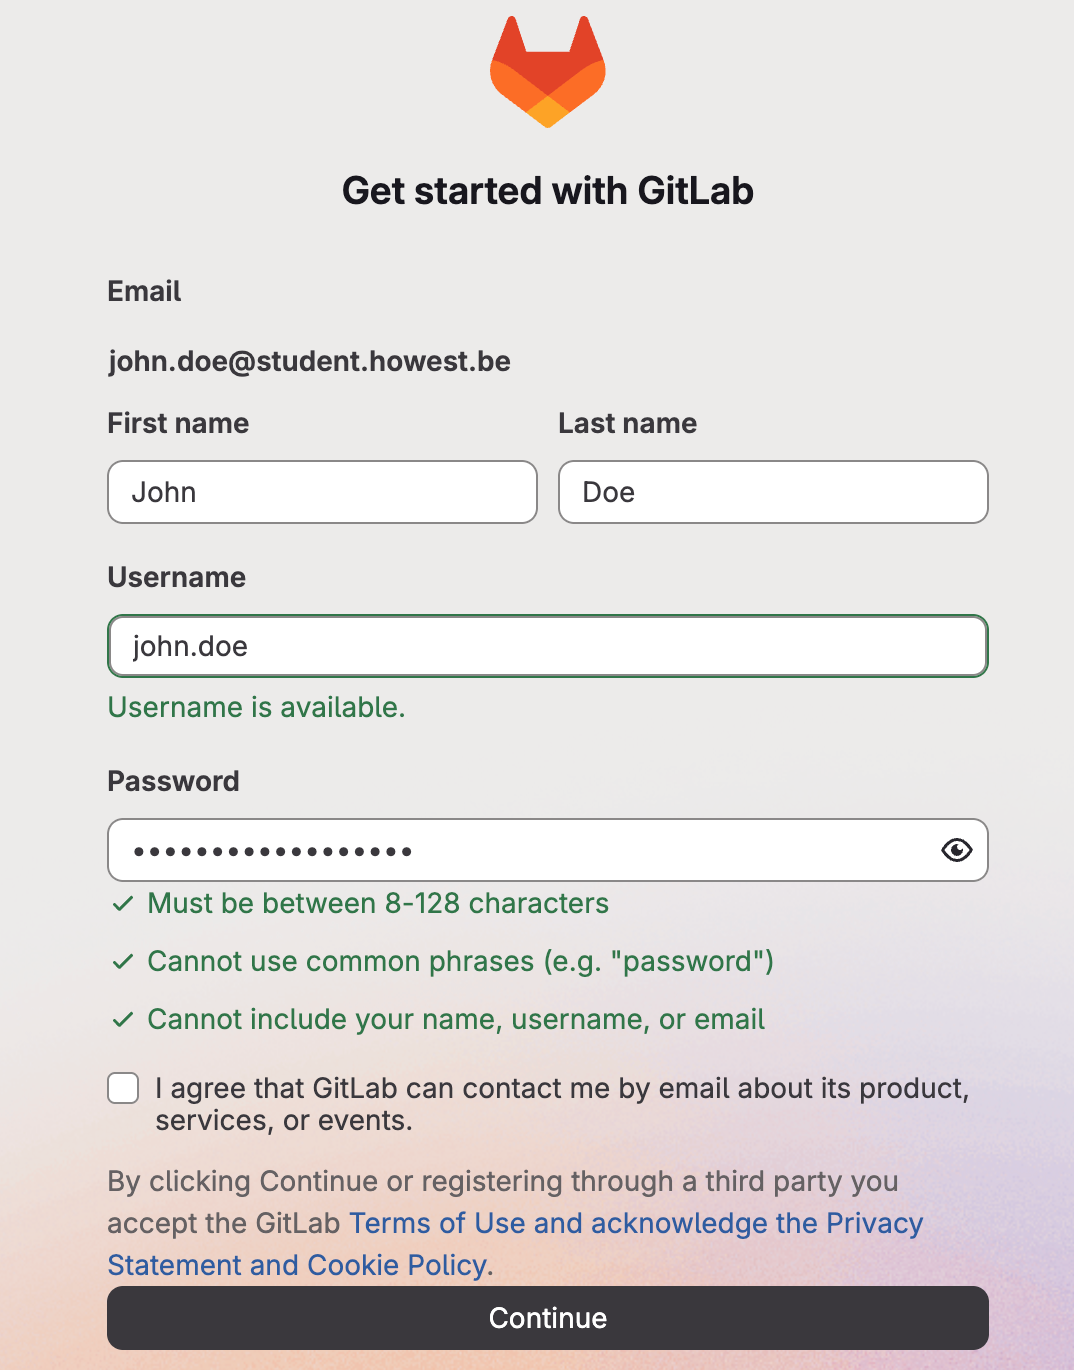
Choose a username with the correct naming convention
Fill in the following data before continuing:
- Your first name and last name (as known by howest)
- A username (this should be the first part of your howest email, preceding the @, so for
john.doe@student.howest.bechoosejohn.doe) - A safe password of your choice
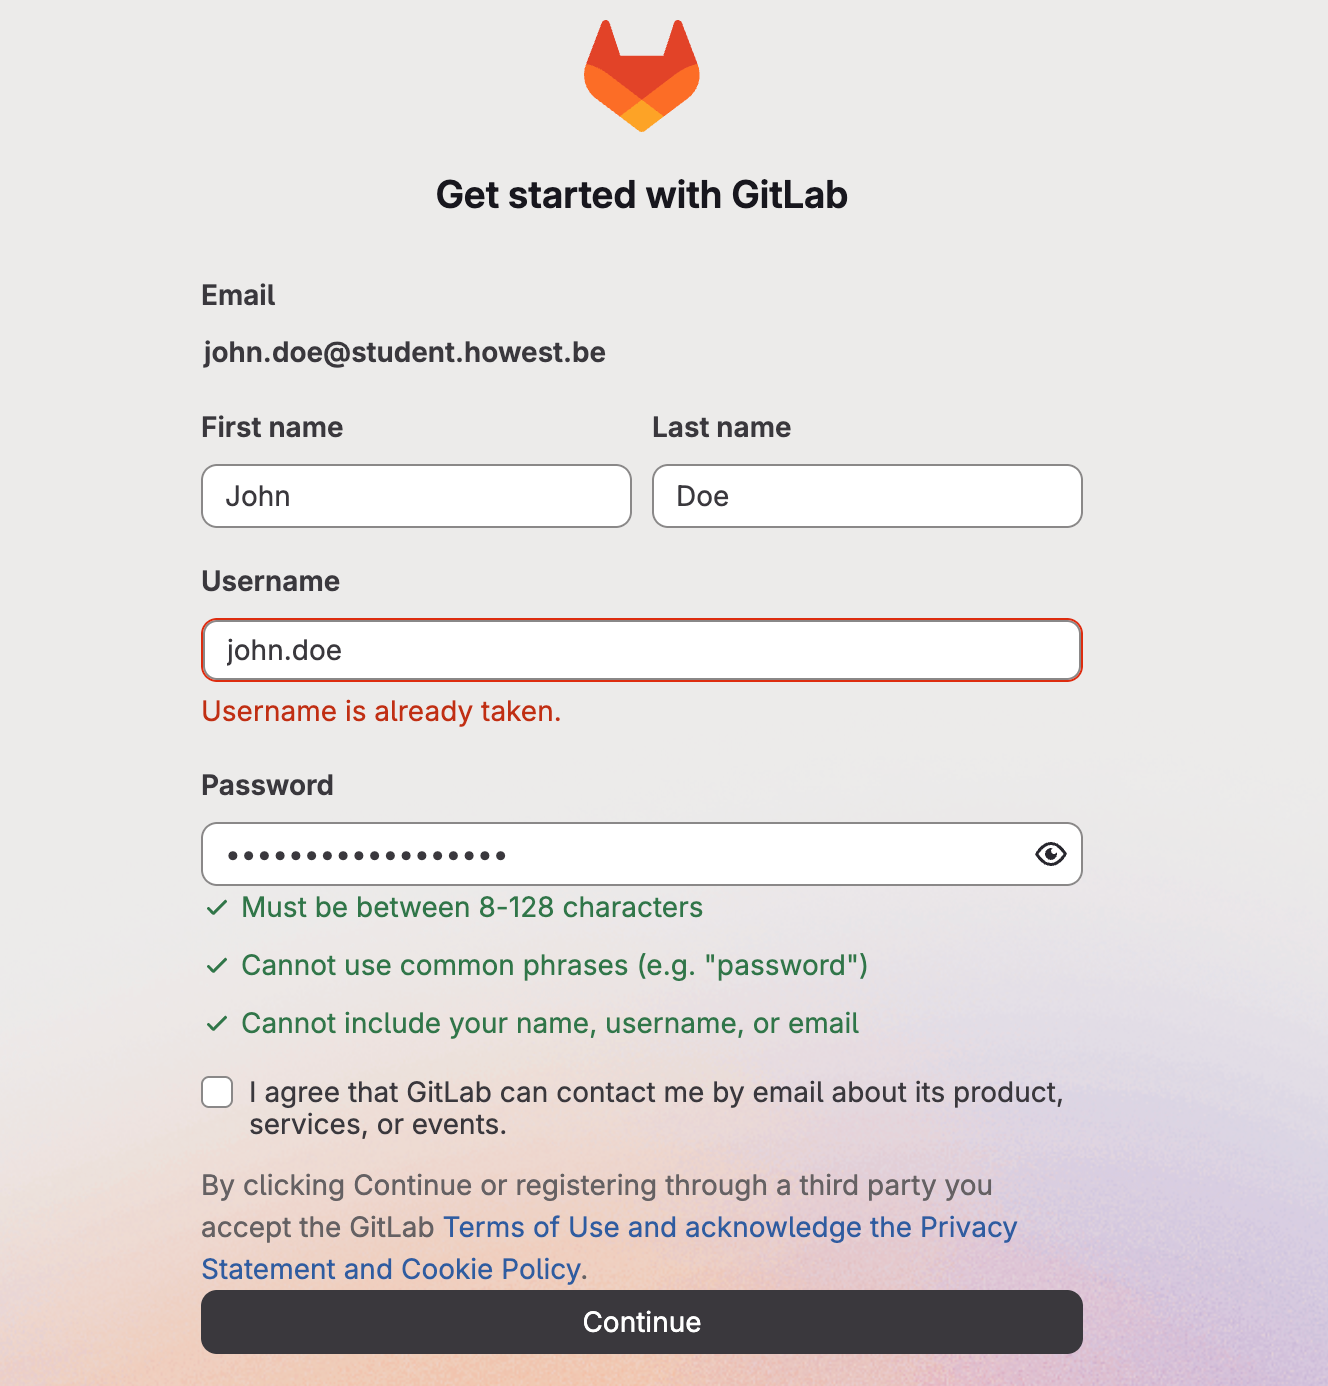
If the username is already taken, add the current academic year to it, e.g. john.doe.2026
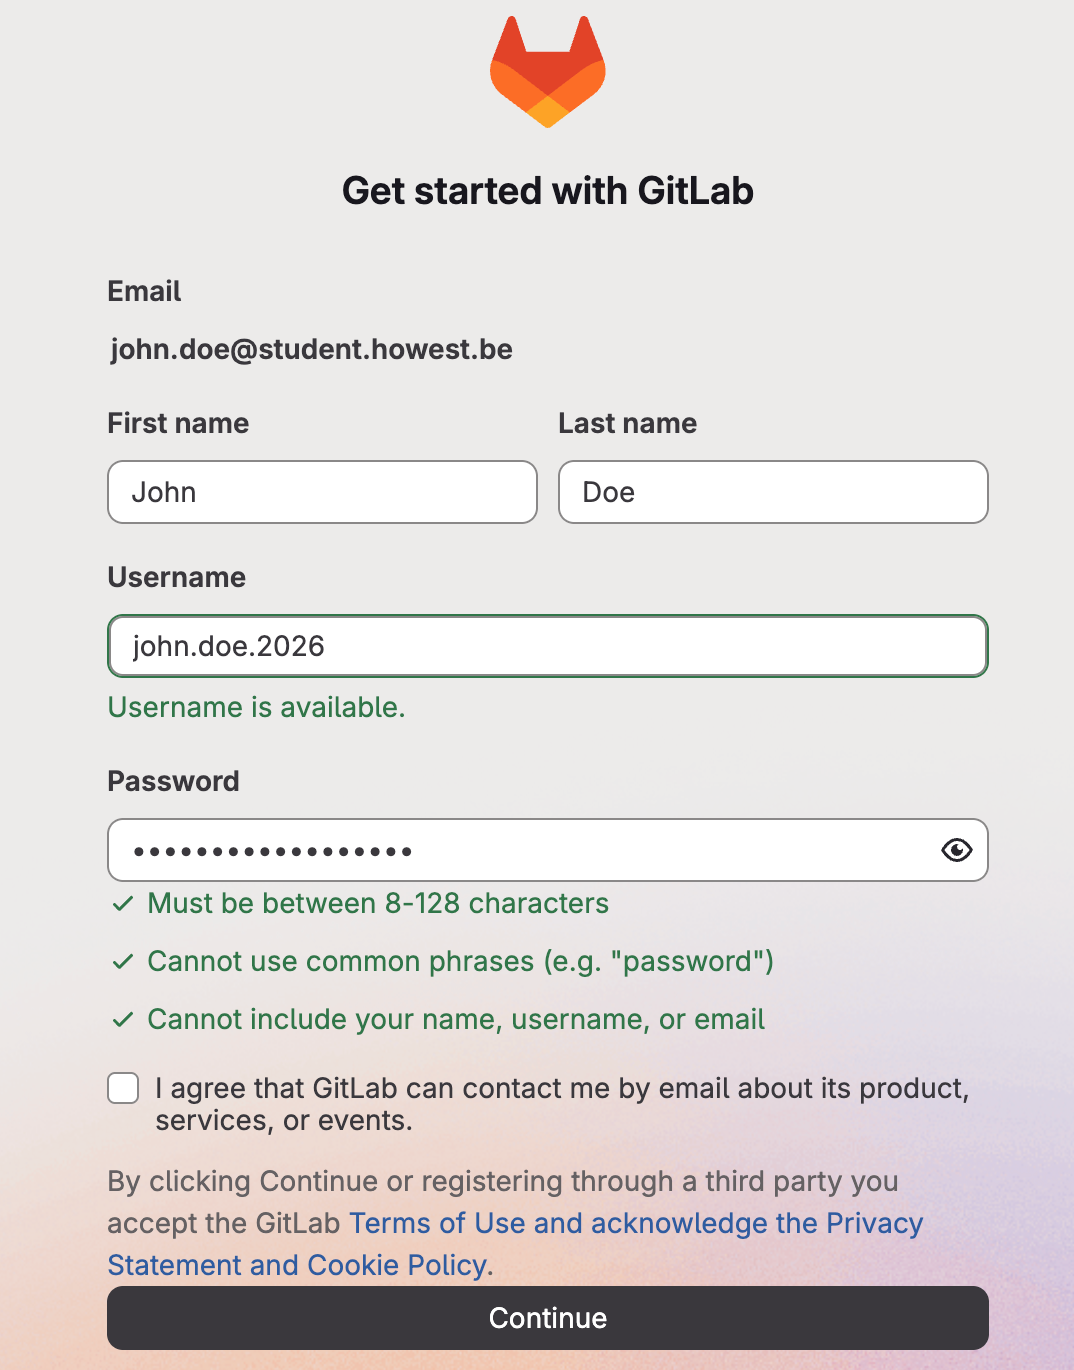
IMPORTANT It is imperative you match the gitlab username to the first part of your howest email. If not, all scripts down the line will fail.
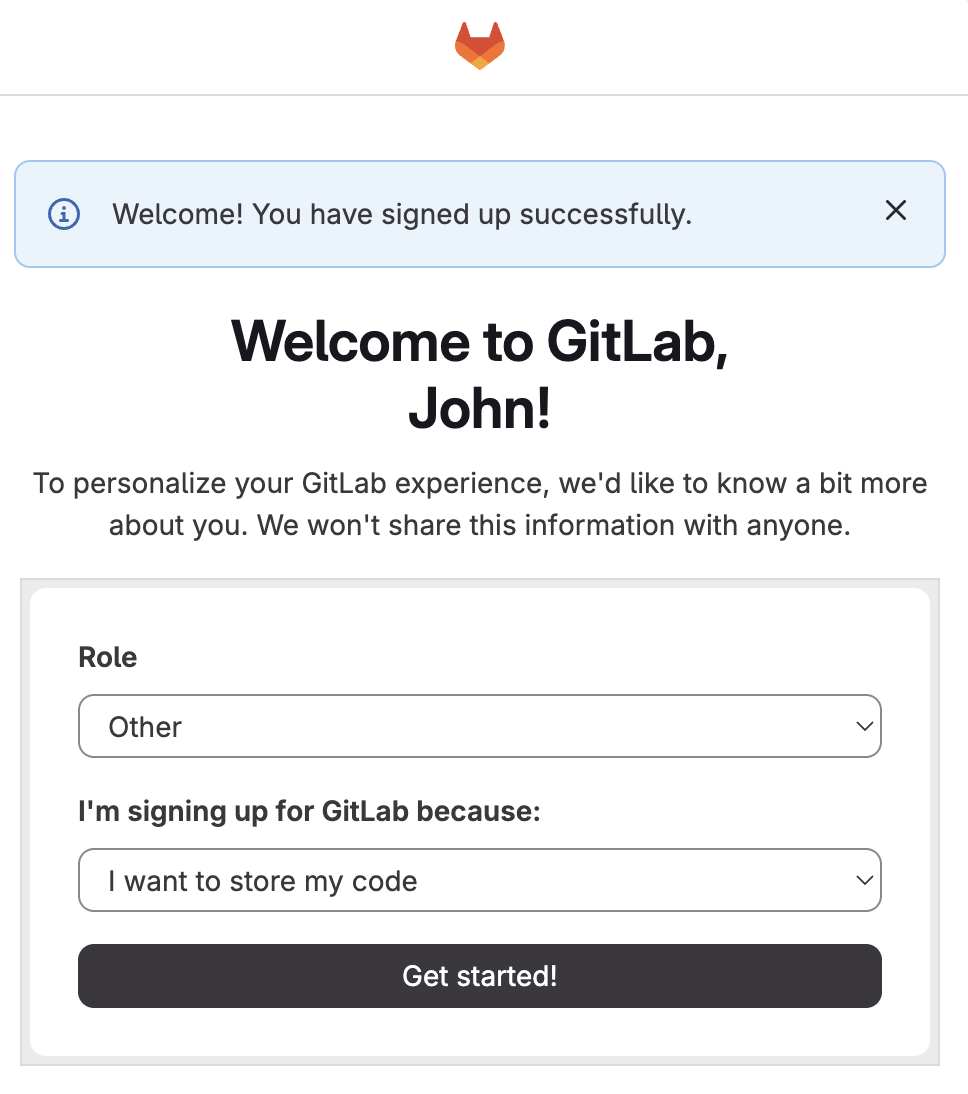
In the next screen choose Other as Role and I want to store my code as reason for signing up for GitLab.
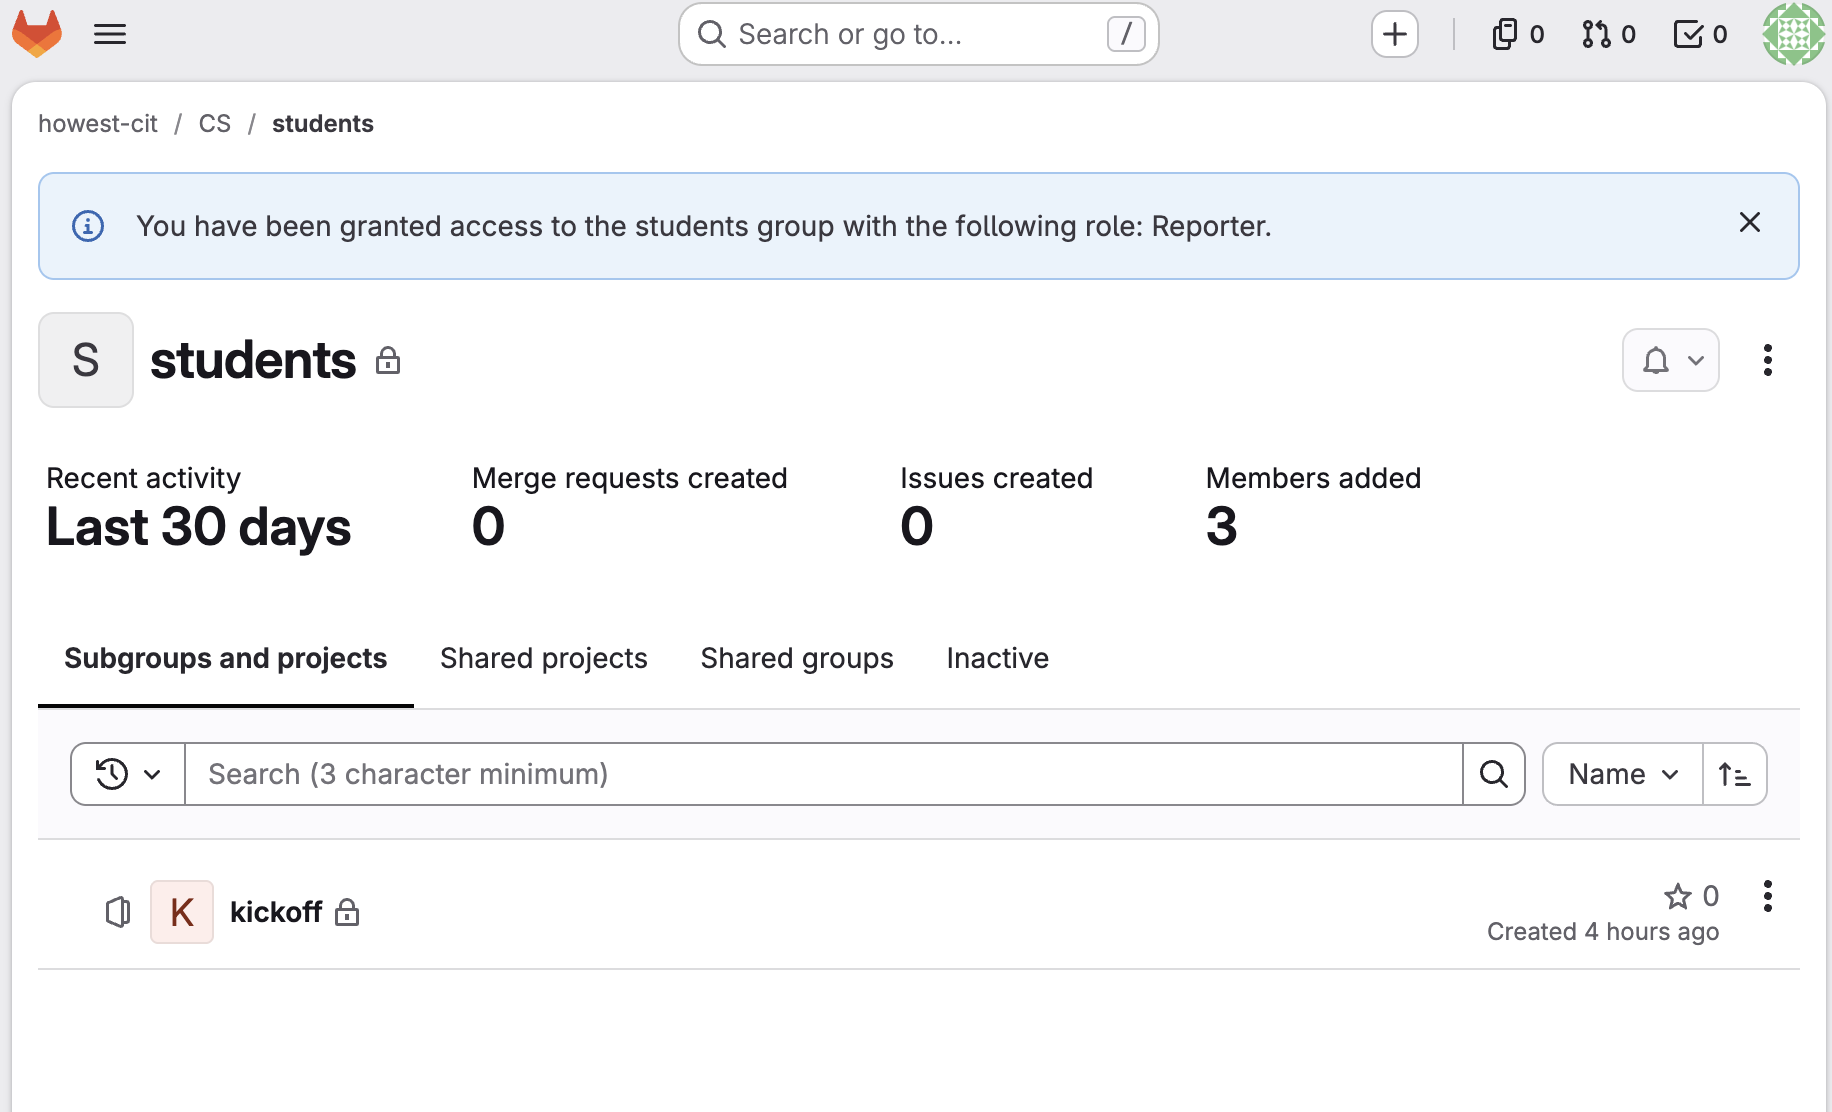
Now open the url gitlab.com/howest-cit in your browser (it might be a good idea to bookmark this link) and if everything was correctly configured, you should see something like this.
Configuring profile
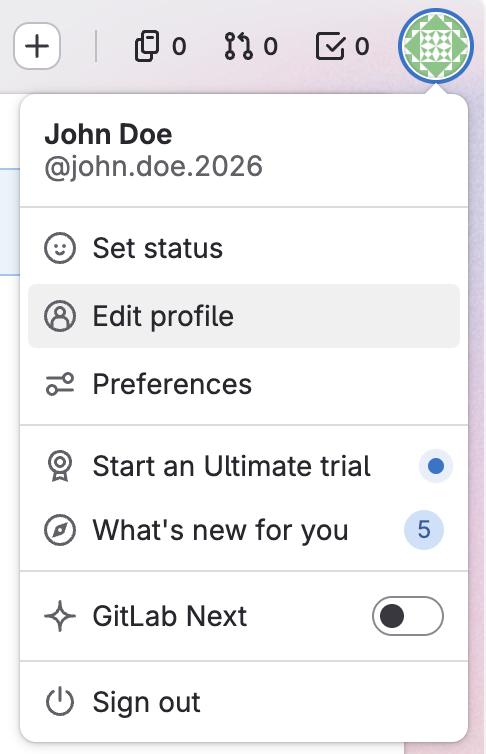
To configure your profile, click on your avatar in the upper right corner and choose edit profile.
Here you can upload your Leho profile picture as an avatar.
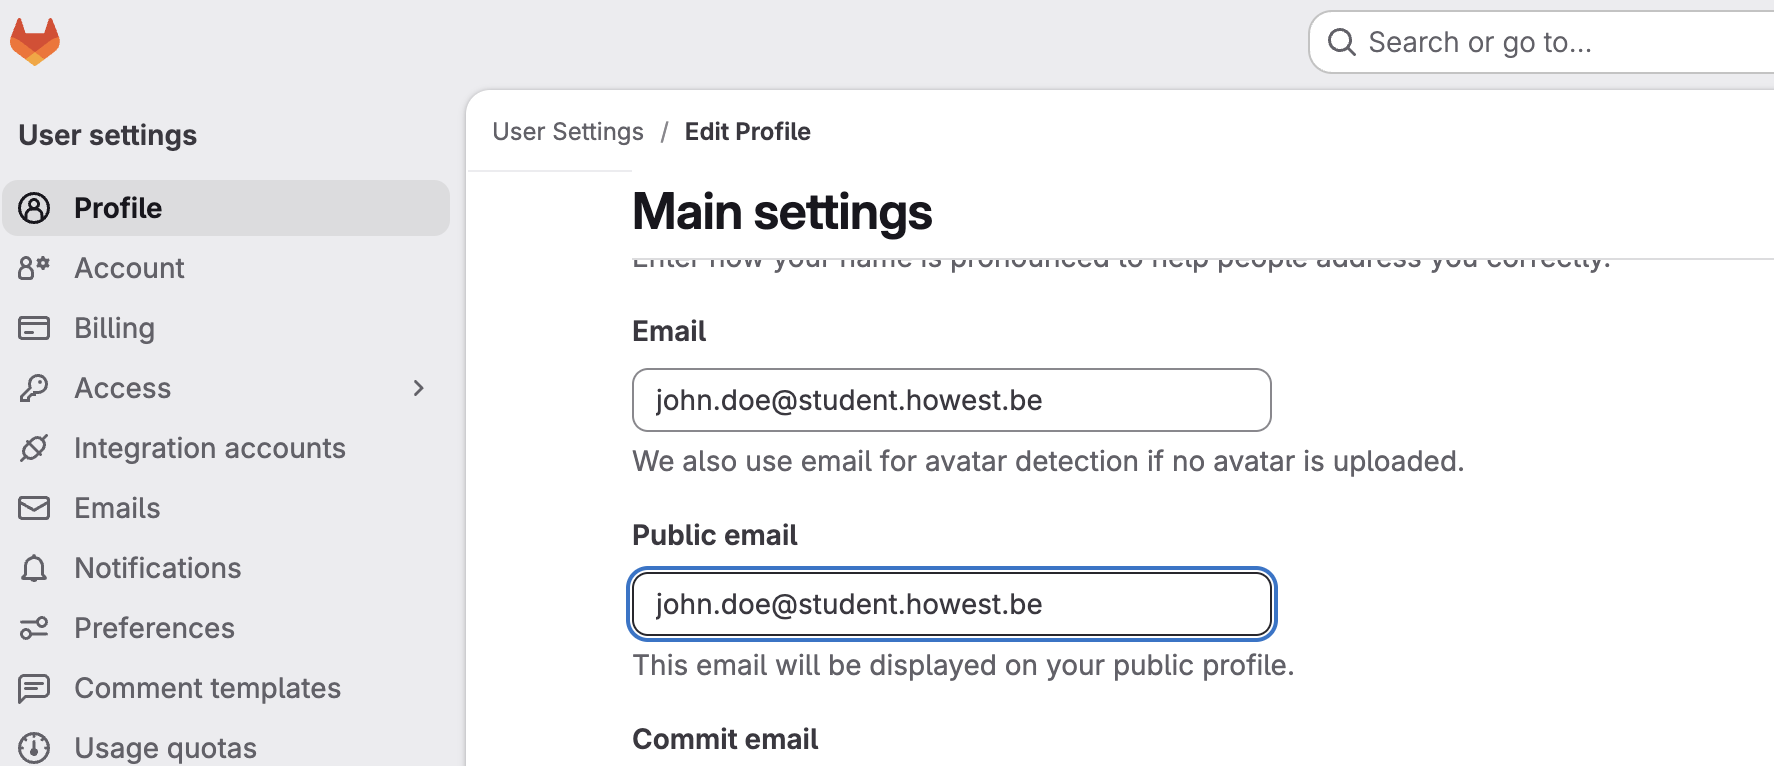
Add a public email address for access to other HOWEST CIT services
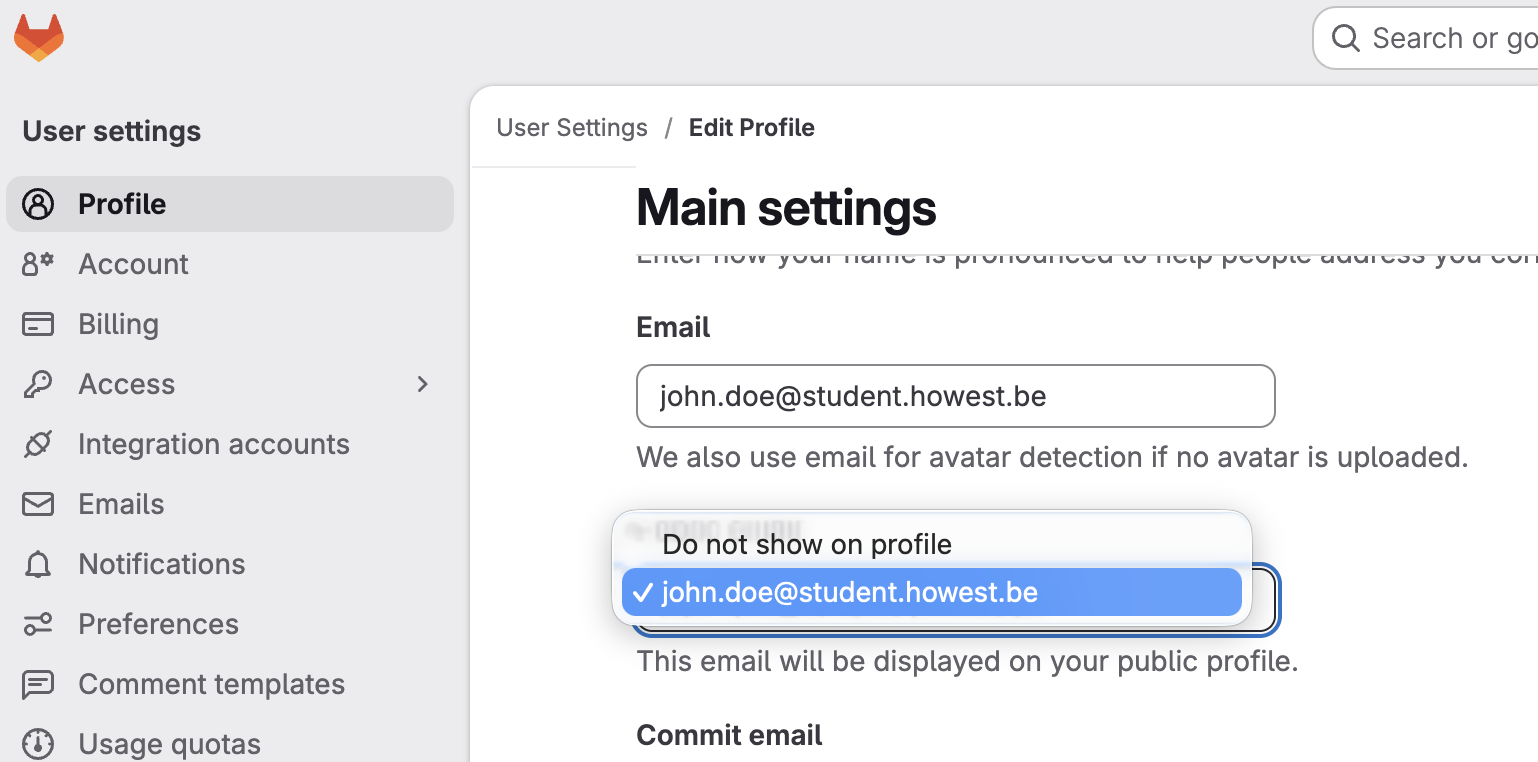
To gain access to all necessary course material it is imperative you add your howest address as a public email. This can be done by changing Public email from Do not show on profile to your howest email address.
 IMPORTANT
If you do not supply your Howest email address as a public address, or you do not respect the naming convention, you will not be given access to other Howest services as none of the scripts will pick up your account.
Keep GitLab open in a browser tab and proceed to Sonar.
Sonar
For our code quality and intelligent assistance, Howest uses the SonarQube environment.
Log in with your Gitlab Cloud account
Browse to https://sonarqube.ti.howest.be/
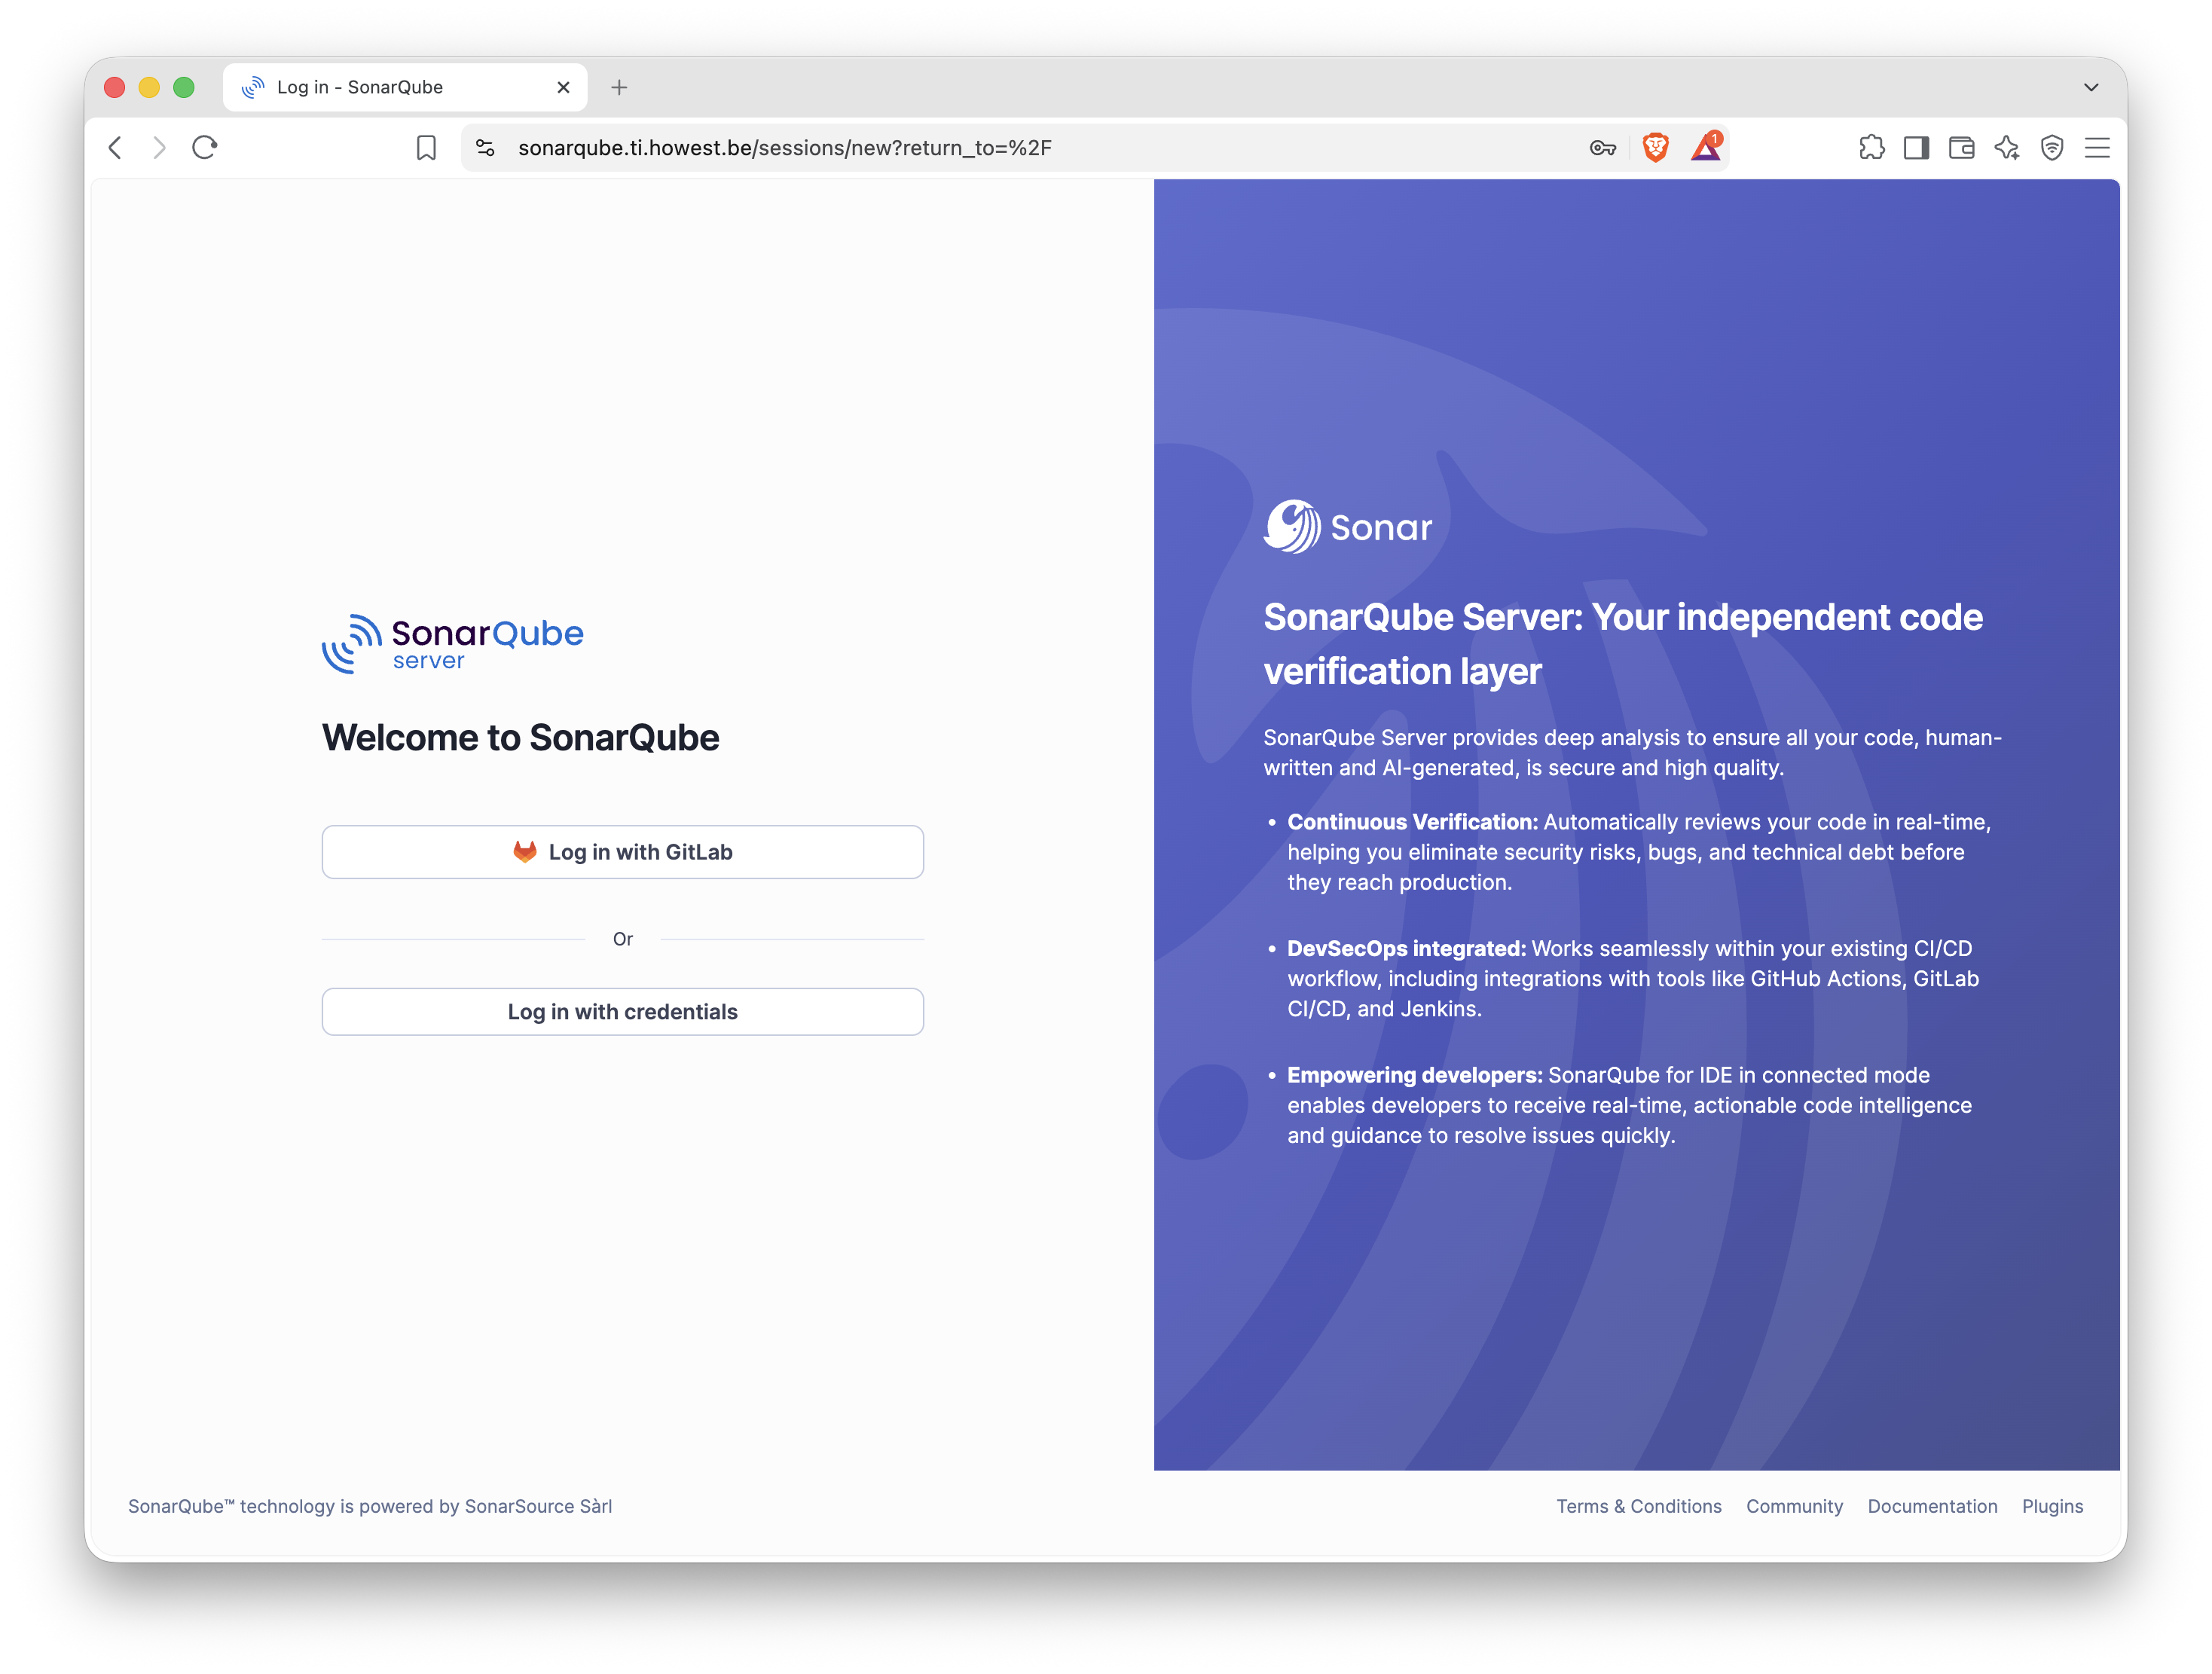 Log in with your Gitlab Cloud account (the one you have just created through accepting the invite, with your howest email).
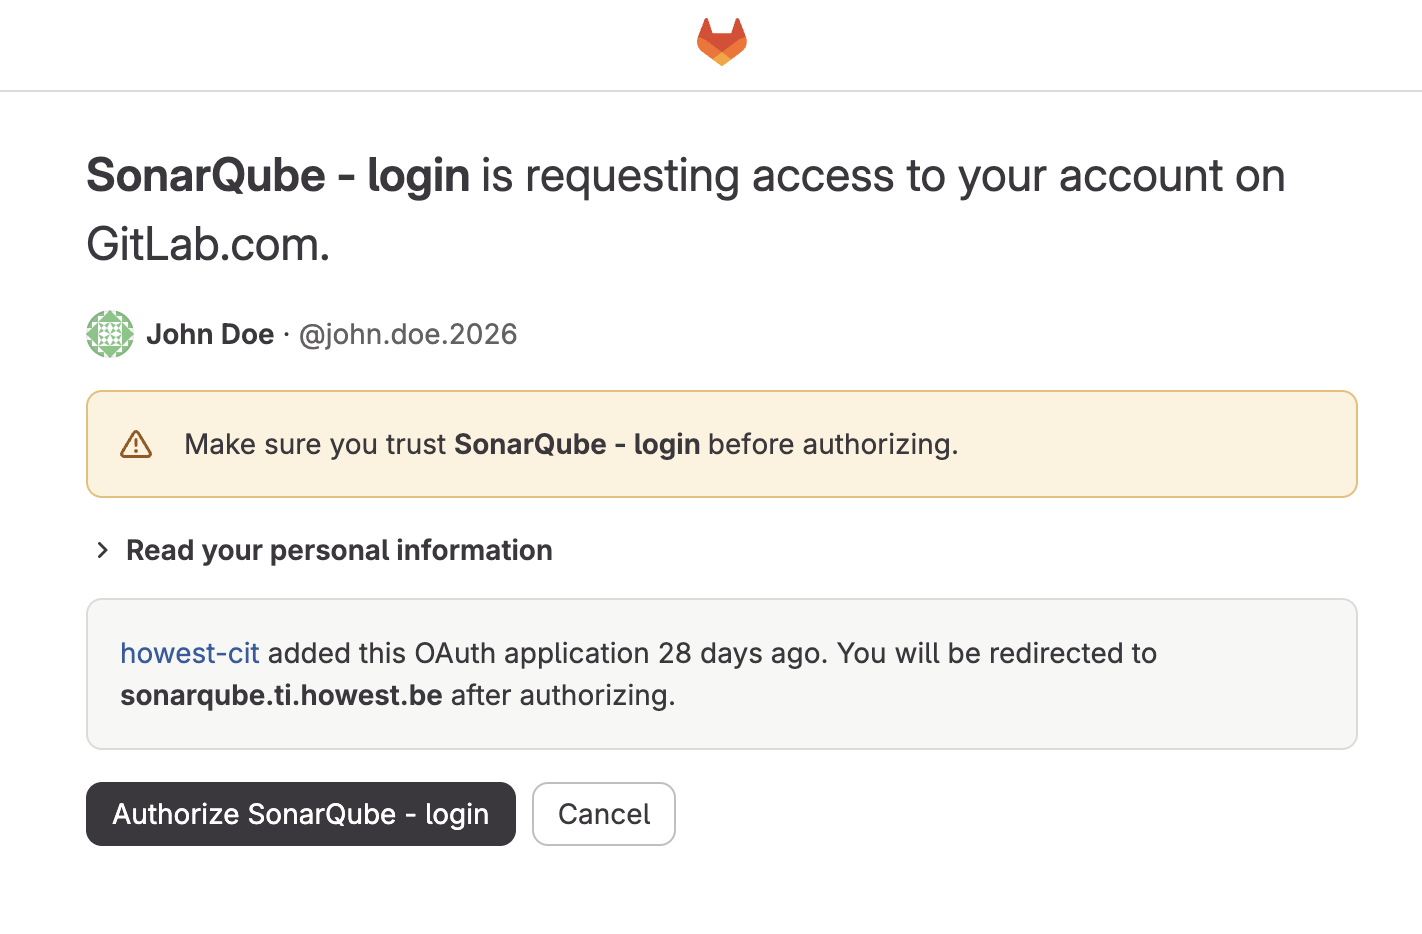
IMPORTANT You cannot use a personal Gitlab Cloud account to log in to sonar. The course scripts will not pick up your credentials. You are required to use the Gitlab Cloud account linked to your howest email address.
If all goes well, you should see a page that looks something like this:
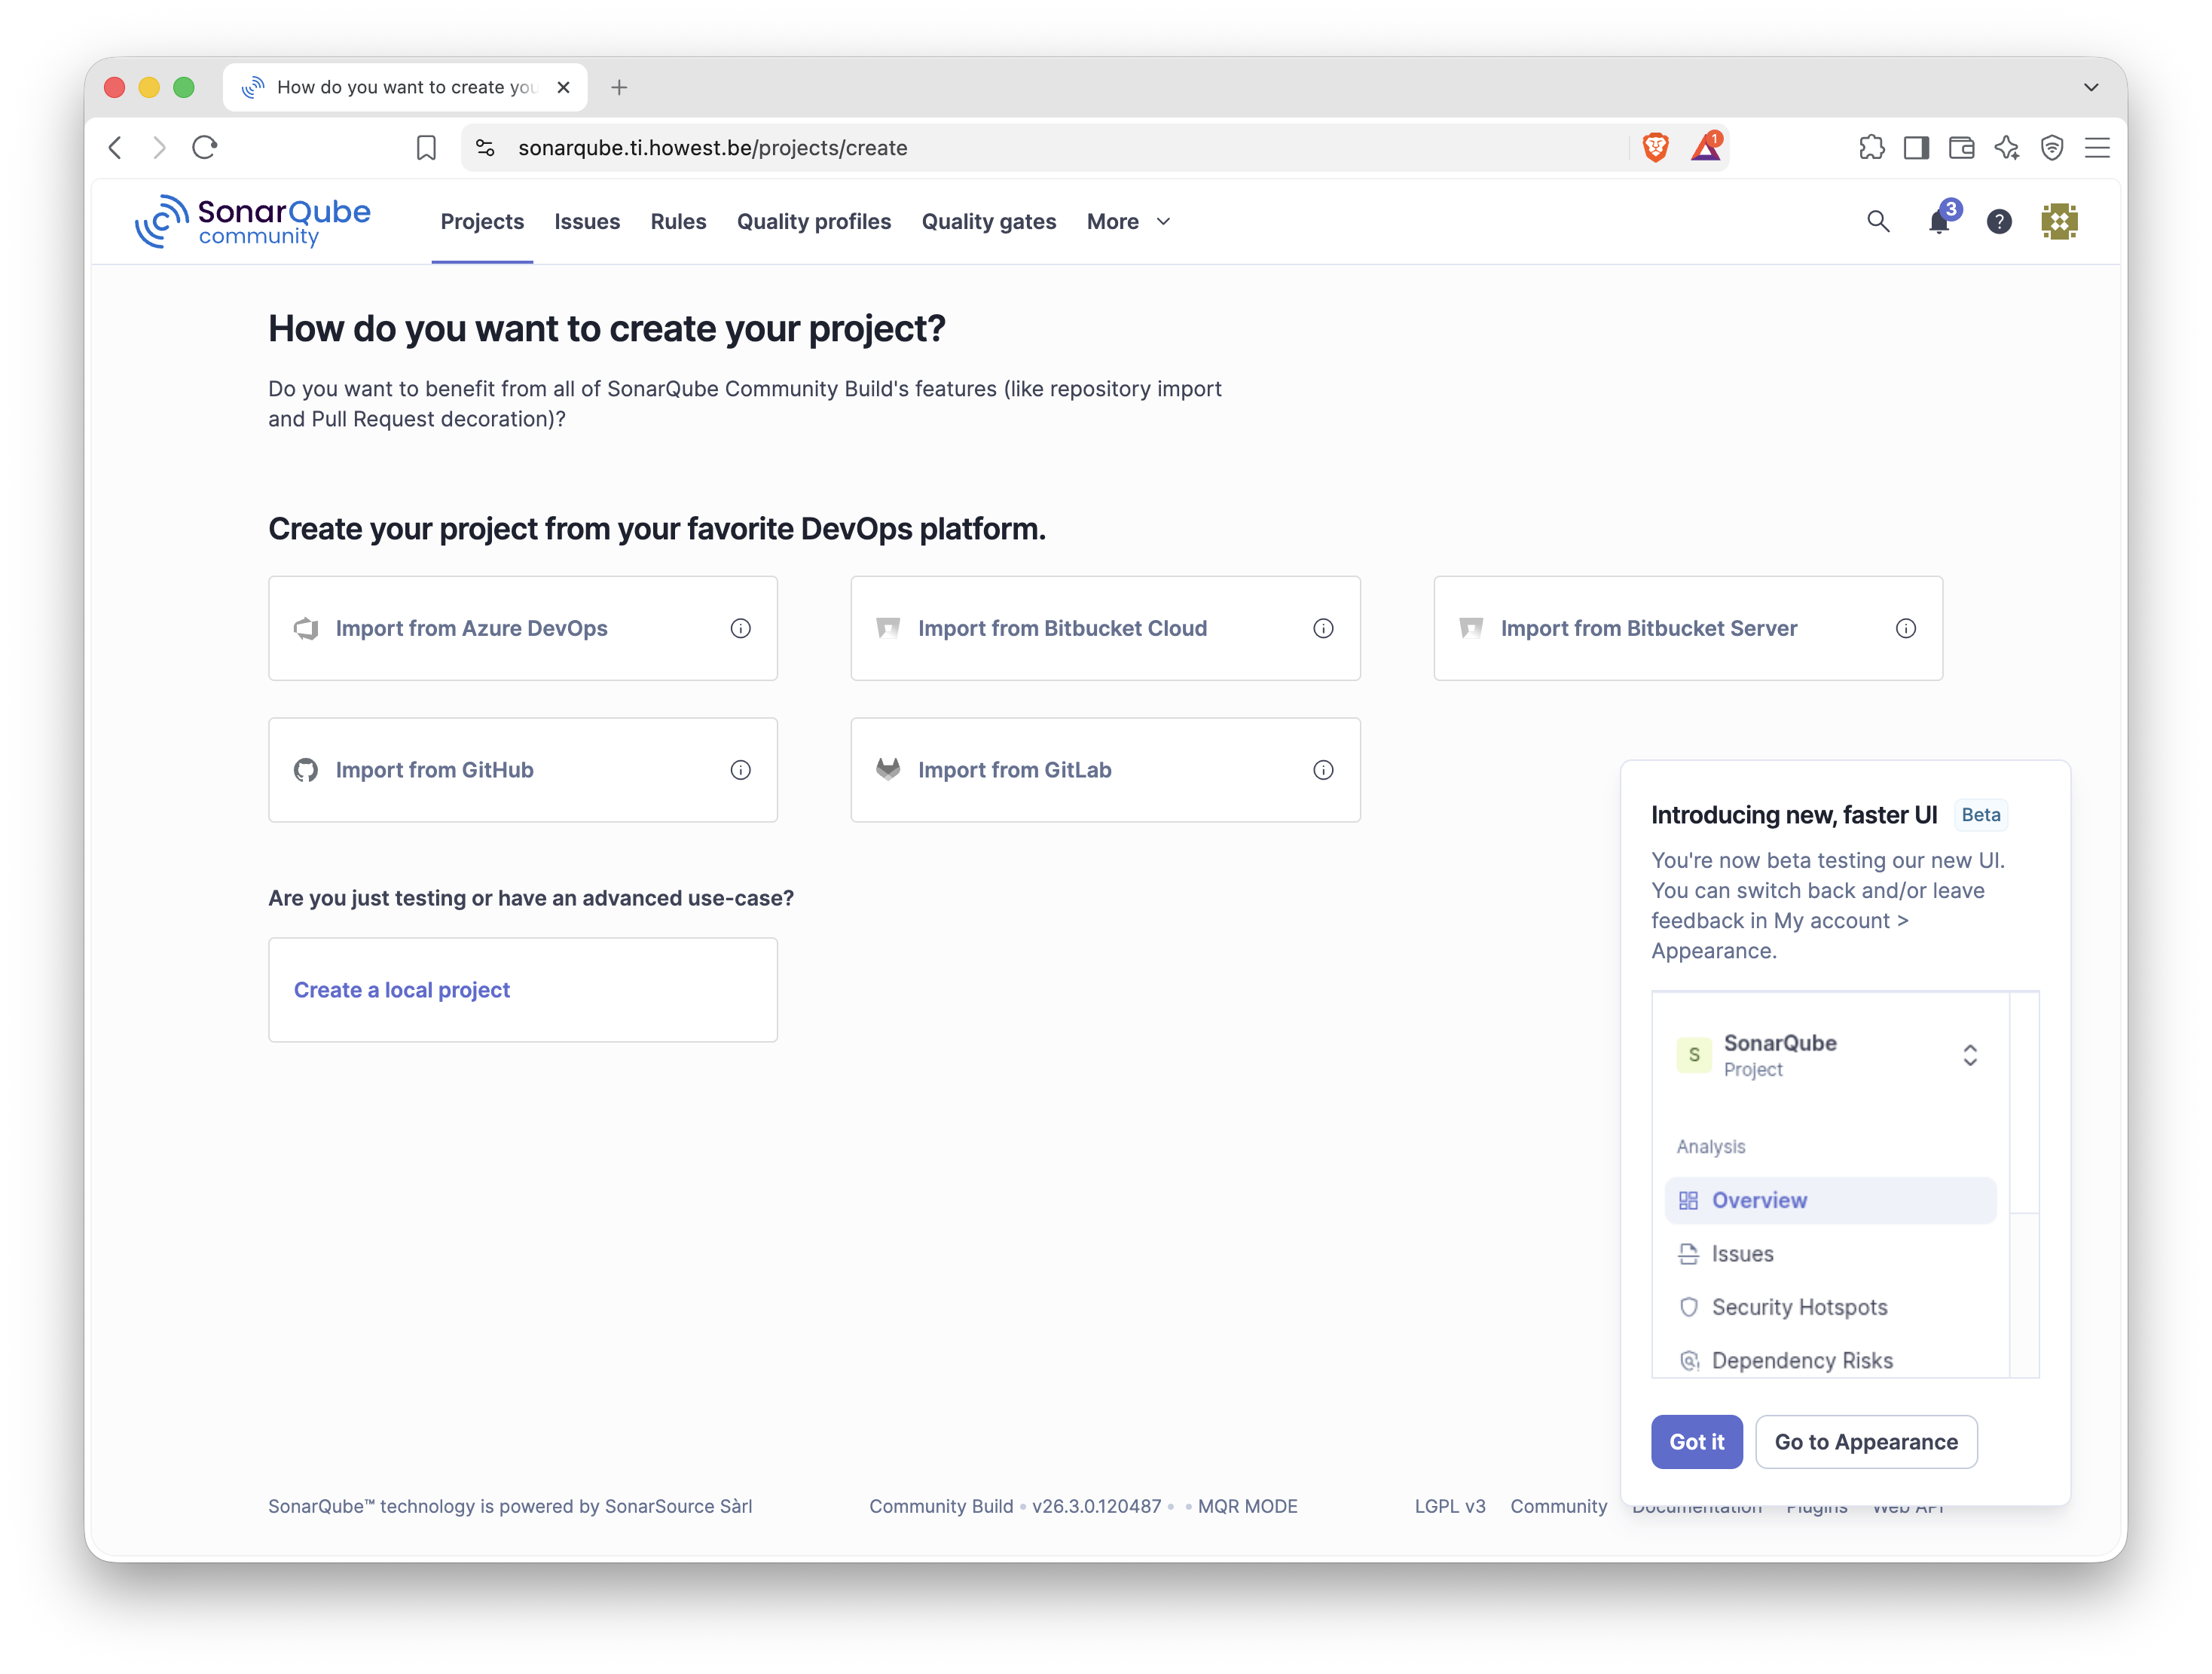
Next up are required configurations such as Git.
Required configuration
Before we install any software, make sure you install git and configure the SSH keys correctly to access it, so you won’t have any trouble accessing our systems.
Git
Git is an extremely powerful piece of software that allows people to work together on code. The official terminology is a distributed version control system. We will use this extensively in a lot of different courses.
Go to Download and download the installer for your operating system (windows/mac/linux). Follow the installation wizard. Choose the defaults unless otherwise specified:
- Select Components: Go ahead and add additional icons > on the Desktop if you want
- Leave all rest default
- Try running
Git Bashby pressing the windows button and searching for it. A black window should open. Try typinggit. This is called a command prompt and we will need it to run commands (for example in the SSH keys section).
Next up: go to SSH Keys
SSH keys
These keys will make life easier. Don’t worry about the details. Just follow the steps of this walk-through! As for most walk-throughs concerning gitlab, it is easiest if you open a second tab or window and keep this page in another.
Login to GitLab
- Make sure you are logged in on https://gitlab.com/ if you aren’t already.
- Click on your avatar-icon and select Preferences. (The avatar can be found at the top of the page. On the left if you use the new (default) style. If you use the old style the avatar can be found on the right side)
- At the left choose Access > SSH keys
- Keep this SSH Keys window open and proceed to the next step of the walk-through.
Generate SSH Keys
- (You can skip this step if you already created an ssh key pair previously.
- Open
Git Bashif it isn’t already open. By pressing the windows button and searching forgit bash. A black window should open where you can type stuff. - In the black window type the following command where you replace your firstname and your lastname to your names:
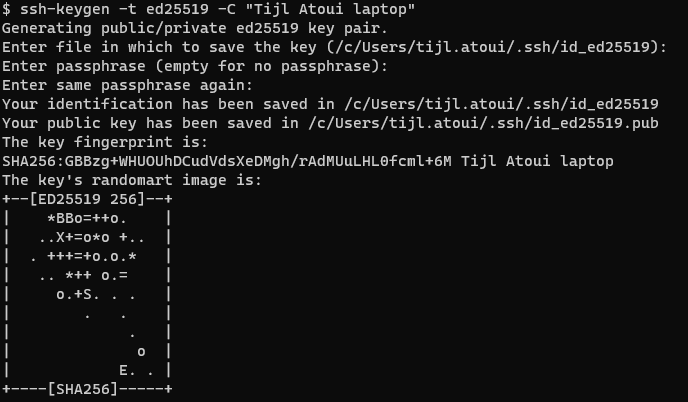
ssh-keygen -t ed25519 -C "firstname lastname laptop" - The command will state that it is generating a public/private ed25519 key pair and it will ask where it should store it. Just press enter (without entering anything)
- It will then ask for a passphrase. Once again just press enter (don’t enter anything)
- Enter once again on the question to type the same passphrase again.
- Some weird looking symbols should apear as shown in the image below.
Copy (public) Key to GitLab
- Still in the black window (git bash) type the following command
cat ~/.ssh/id_ed25519.pub - This should print some text starting with ssh-ed25519 and ending with your
firstname lastname laptop - Select this text with your mouse and copy it (right-click > copy)
- Go back to your browser (from the previous step) to GitLab and click
Add new key - Paste the copied key in the field key.
- Enter a title. For example firstname lastname laptop
- Empty Expires at (this means it won’t expire)
- Press Add key
Test if it works
To test you need to go back to the black window (git bash) and type the following command: ssh -T git@gitlab.com Answer yes to the question “Are you sure you want to continue connecting (yes/no)?”
Try to run the same command again: ssh -T git@gitlab.com. Now it should only say “Welcome to GitLab, @firstname.lastname!”
More information or troubleshooting
If there are teachers around, go ahead and ask! :)
Otherwise this might help: SSH Explanation and Troubleshooting
Next up
Explanation
To fully understand what is happening here you need to have a bit of a background. This means it is perfectly fine and acceptable to just follow these steps not knowing what you are doing :) The main goal is to make everyone’s live easier! Don’t worry about the details.
The idea with Git is that we ‘push’ and ‘pull’ files from and to a server. Everytime we do this we need to tell the server “hey this is john, here are my files”. We do this by authenticating to the server. Essentially we will configure our computer in such a way that we won’t have to type our username/password everytime we do something with Git on our GitLab server. SSH-keys will help us: everyone will have their own key pair. The private one is, well… private (meaning: DO NOT SHARE THE PRIVATE KEY). If you sign a message with your private key, any other system can verify it’s you by checking if it fits your public key. The public key is public :).
Installation
- Open
Git Bashby pressing on the Windows (start icon) and searching forGit bash. A black screen should open. This is called a command prompt. We will need it to run commands. - Generate a SSH key pair. There are several underlying algorithms for generating a key pair. The most used ones are
RSAandED25519. We recommend to useED25519:- https://docs.gitlab.com/ee/ssh/#ed25519-ssh-keys
- https://docs.gitlab.com/ee/ssh/#common-steps-for-generating-an-ssh-key-pair
- Add your public key to GitLab, so GitLab can verify your private key: Now you can copy your public SSH key you created to your GitLab account. To do so, follow these steps: copy your public SSH key to a location that saves information in text format.
- The following options copies your public ED25519 key to the clipboard for the noted operating system (if you’re using an RSA key, substitute accordingly):
- MacOS:
pbcopy < ~/.ssh/id_ed25519.pub - Linux (requires the xclip package):
xclip -sel clip < ~/.ssh/id_ed25519.pub - Git Bash on Windows:
cat ~/.ssh/id_ed25519.pub | clip
- MacOS:
- Navigate to https://gitlab.com and sign in.
- Select your avatar in the upper right corner, and click
Settings - Click
Access > SSH Keys. - Click
Add new key - Paste the public key that you copied into the
Keytext box. - Make sure your key includes a descriptive name in the
Titletext box, such as Work Laptop or Home Workstation. - Include an (optional) expiry date for the key under
“Expires at”section. (Introduced in GitLab 12.9.) - Click the
Addkey button.
Testing setup
To test whether your SSH key was added correctly, run the following command in your terminal (replacing gitlab.com with your GitLab’s instance domain):
ssh -T git@gitlab.com
The first time you connect to GitLab via SSH, you should verify the authenticity of the GitLab host that you’re connecting to. For example, when connecting to gitlab.com, answer yes to add gitlab.com to the list of trusted hosts:
The authenticity of host 'gitlab.com (193.191.179.153)' can't be established.
ED25519 key fingerprint is SHA256:3rYn6X8aEo5dqIiM+59Bci3HwMozUTBQnHR95K/+Yck.
This key is not known by any other names
Are you sure you want to continue connecting (yes/no/[fingerprint])?
Once added to the list of known hosts, you should validate the authenticity of GitLab’s host again. Run the above command once more, and you should only receive a Welcome to GitLab, @username! message.
If the welcome message doesn’t appear, you can troubleshoot the problem by running ssh in verbose mode with the following command:
ssh -Tvvv git@gitlab.com
More info
https://docs.gitlab.com/ee/ssh/
Install General Software
Basic IT on campus (reminder)
Within the infosite of your study choice on our learning management platform ‘Leho’, you’ll find basic information about the wireless network, copying, printing, timetables, VPN connection etc.
Office 365 Suite
When receiving a Howest-account you automatically have a Microsoft Office 365-account as well as a Google-account.
To install the Microsoft Office 365 Suite (Word, Excel) through your subscription you can follow the next steps:
- Go to office.com and login with your Howest email and password
- Once logged in you can use the web-based version of the Microsoft Applications.
- If you want to install the desktop applications as well, follow these steps:
- Navigate to https://m365.cloud.microsoft/apps
- At the top right there is a button to install the
Microsoft 365desktop applications as well.
- Make sure Microsoft Teams is installed as we will use this tool a lot!
- Follow the installation wizard(s) as appropriate.
When Microsoft Teams is installed (or within the web based app), you should already be in the correct student Team. If not, join the correct Team as follows:
- Go to the ‘Teams’ section in the left side bar
- Click ‘Join or create team’ and use the code:
0fr0w80to join the Cyber Security student 26-27 Team!
Academic Software
Howest offers software via Academic Software. You can login with your Howest credentials and find useful software. This is optional and not necessary for the courses.
Browsers
A browser is a piece of software that allows the user to “browse” (= access) files and data on the Internet (or other networks). We suggest having multiple browsers available on your computer. Go ahead and follow the installation wizard.
Recommended (at least have these installed)
Virtualisation
You will often create (temporary) virtual machines with other operating systems or specific software installations. In order to prevent this from cluttering up your laptop/desktop a good virtualisation engine is necessary. You can use either:
You can keep all the default settings during install, but we recommend to disable the option to join the VMware Customer Experience Improvement Program.
IMPORTANT We do not support ARM architecture, or Chromebooks. So continue at your own peril. Details on supported architectures can be consulted on Howest hardware.
Editors
An editor is a piece of software that allows the user to interact with text files. Word from the Office suite is used to create documents with markup and/or images and is not considered an editor. The most common example of a very basic editor (on Windows) is notepad. In this degree, we will be making use of the Jetbrains stack, which will be handled in Course specific Software.
Jetbrains registration
Before downloading the software, however, you must ensure you are registered as a student to be eligible for free use of this software.
Go to https://www.jetbrains.com/shop/eform/v2/students and fill out all the fields of the form:
- Use your Howest-email!
- Level of study: undergraduate
- Graduation date (if prompted): choose september 2029
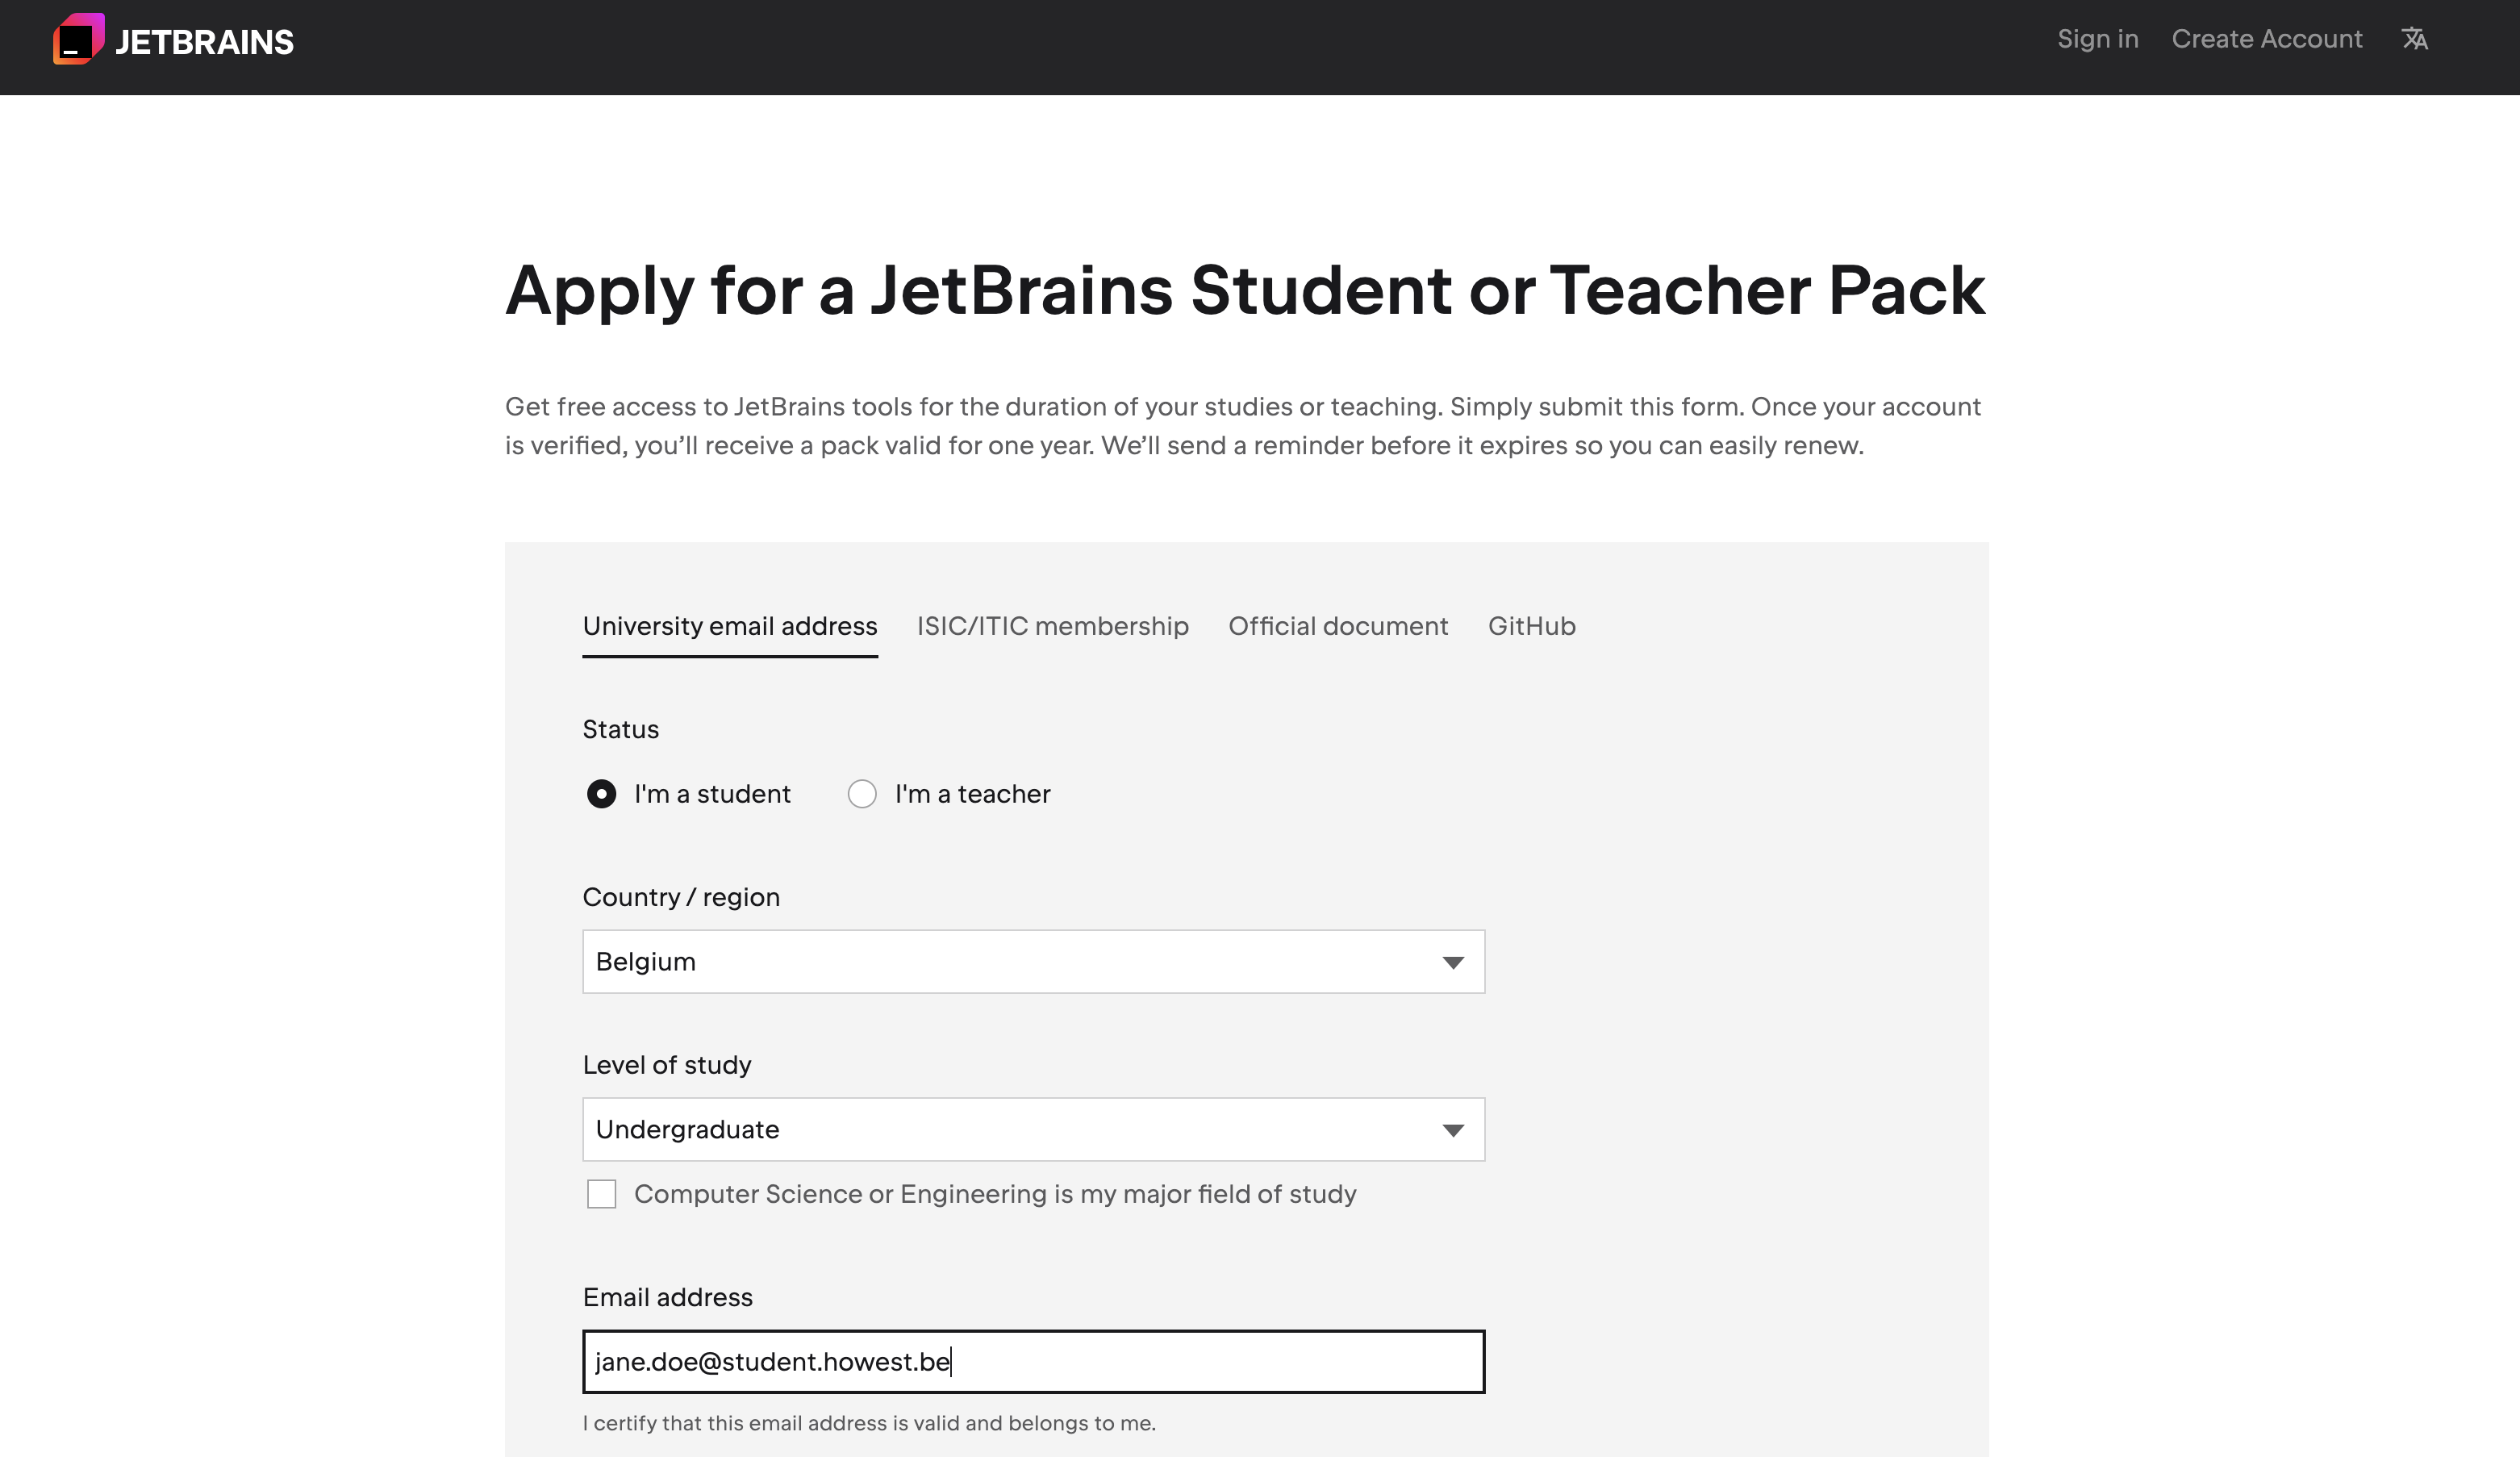
You should receive a confirmation mail. You will need your account in future steps. For now you can continue with Git.
Final step: Course specific software
Course specific Software
Communication Skills
No special actions required, everything will be explained and discussed in the first lab.
Computer Architectures & Operating Systems
- ISO files: Download the following ISO files
No further special actions required, everything else will be explained in the first lab.
Cybersecurity Essentials
No special actions required, everything will be explained and discussed in the first lab.
Databases Fundamentals
For this course, you require Visual Studio Code.
- Download Visual Studio Code
- Accept the agreement
- Choose installation location (default is ok in most cases)
- You can choose to create a
Start Menu folderor not - Go ahead and create a
Desktop Iconif you want. - Finish!
- Once installed, open Visual Studio Code
- Next, install the following extension using the Extensions tab (4 squares) at the left of Visual Studio Code:
SQL Server (mssql) - Microsoft
Web Development Fundamentals
Browsers, WebStorm, Java and NodeJS
- Browsers: (see General Software > Browsers)
- Git: (see General Software > Git)
- Jetbrains - WebStorm:
- Go to the Jetbrains website and download WebStorm
- Register as a student (see General Software > Jetbrains registration)
- When using WebStorm, login with your HOWEST email.
- Java:
- Download the (https://www.oracle.com/be/java/technologies/downloads/) [latest LTS version of the Java JDK].
- Test your installation by opening a terminal window (cmd) and entering
java --version. You should see Version 25 or higher
- NodeJS: see Programming Fundamentals
Programming Fundamentals
WebStorm and NodeJS
- Git (see General Software > Git)
- Jetbrains - WebStorm (see Semester 1 > Web Development Fundamentals You need to install and configure WebStorm the exact same way as for Web Development. You only need to do this once.
- NodeJS: Download and install. The LTS version (long term support) is perfect.download Installation should be straight forward. To verify your installation, open a terminal (command line) and type node and hit enter. If you see “Welcome to Node.js” you are ready to proceed.
- Restart WebStorm after the installation of NodeJS.
Congratulations
Pfew! We are done. You (and your computer) are ready to start! :)
Should you need it, you may refer to the optional VPN section for external access to internal resources.
VPN
This is an optional step. Most of Howest’s resources are publicly available, however, in the event you should need to reach a resource that is only available on our internal infrastructure, the steps below detail how you may access these through a VPN connection.
CIT VPN
To connect to specific servers within the ‘Cluster IT’ (CIT) educational programmes on the Howest infrastructure, a VPN connection is needed when you’re at home. Follow these instructions to set up that VPN.
- Download the OpenVPN client.
- Install this client with default settings
- Download the Howest CIT profile for OpenVPN
- Import the downloaded profile in the client using the button at the bottom of the screen.
- Do not login with your Howest credentials yet.
- First, click the hamburger menu in the top left corner of the client and choose “My Profiles”.
- Then click the pencil icon next to the profile you just imported. Make sure the option for the external certificate is disabled (it is enabled by default). Save the changes.
- Now login with your Howest credentials (including the suffix
@student.howest.be). You will be redirected to a web page to confirm your login. Warnings might be shown in the browser. These can be ignored. - In case you get a warning about the certificate, you can ignore it. The certificate is valid, but not signed by a trusted authority. This is normal for the moment for our internal certificates. Click “Advanced” and then “Proceed” (or similar) to continue.
- The client should now show ‘connected’: you’re at the Howest network via VPN.
Howest VPN
Whilst the previous VPN setup is specific for accessing remotely the IT equipment dedicated to your Cybersecurity courses, there is also another VPN configuration for remote access to general Howest services.
Go to the Helpdesk info page on VPN. Follow these instructions to install the Howest VPN. Most things will be available from home. Follow the instructions of your teachers if and when you would need this VPN software, but by installing and configuring you already have a head start.